1910 字
10 分钟
iOS逆向指路
1. 越狱
1.1. palera1n
palera1n的核心是利用checkm8漏洞,这是一个影响从A8到A11芯片的低级别硬件漏洞,允许不受限制的访问设备的BootROM。项目中的loader应用负责引导越狱过程,而jbinit则在系统内核层面进行操作,确保越狱的持久性和可靠性。定制的PongoOS是一个特别设计的操作系统层,用于增强越狱后的设备功能和性能。palera1n越狱支持A8-A11设备,注意iOS16以上需重置设备。完整列表如下:
| iPhone(s) | iPad(s) | iPod(s) | Apple TV(s) | Apple T2 |
|---|---|---|---|---|
| iPhone 6s | iPad mini 4 | iPod Touch (7th generation) | Apple TV HD | Apple T2 iMac20,1 |
| iPhone 6s Plus | iPad (5th generation) | Apple TV 4K (1st generation) | Apple T2 iMac20,2 | |
| iPhone SE (2016) | iPad (6th generation) | Apple T2 MacBookAir8,1 | ||
| iPhone 7 | iPad (7th generation) | Apple T2 MacBookAir8,2 | ||
| iPhone 7 Plus | iPad Pro (9.7”) | Apple T2 MacBookAir9,1 | ||
| iPhone 8 | iPad Pro (12.9”) (1st generation) | Apple T2 MacBookPro15,1 | ||
| iPhone 8 Plus | iPad Pro (10.5”) | Apple T2 MacBookPro15,2 | ||
| iPhone X | iPad Pro (12.9”) (2nd generation) | Apple T2 MacBookPro15,3 | ||
| iPad Air 2 | Apple T2 MacBookPro15,4 | |||
| Apple T2 MacBookPro16,1 | ||||
| Apple T2 MacBookPro16,2 | ||||
| Apple T2 MacBookPro16,3 | ||||
| Apple T2 MacBookPro16,4 | ||||
| Apple T2 iMacPro1,1 | ||||
| Apple T2 Macmini8,1 | ||||
| Apple T2 MacPro7,1 | ||||
| iBridge2,11 (Unknown Mac) | ||||
| iBridge2,13 (Unknown Mac) |
下载地址在 github release,以无根rootless越狱模式执行,如下:
# 避免各种报错
# 执行权限
$ chmod +x ./palera1n-macos-universal
# 清除附加属性
$ xattr -c ./palera1n-macos-universal
# 执行
$ ./palera1n-macos-universal -l
#
# palera1n: v2.0
#
# ========  Made by  =======
# Made by: Nick Chan, Ploosh, Khcrysalis, Mineek, staturnz, kok3shidoll, HAHALOSAH
# ======== Thanks to =======
# Thanks to: llsc12, Nebula, Lrdsnow, nikias (libimobiledevice),
# checkra1n team (Siguza, axi0mx, littlelailo et al.),
# Procursus Team (Hayden Seay, Cameron Katri, Keto et.al)
# ==========================

 - [09/11/24 17:58:32] <Info>: Waiting for devices
 - [09/11/24 17:58:32] <Info>: Entering recovery mode
 - [09/11/24 17:58:44] <Info>: Press Enter when ready for DFU mode

Hold volume down + side button (0)
Hold volume down button (4)
 - [09/11/24 17:58:56] <Info>: Device entered DFU mode successfully
 - [09/11/24 17:58:57] <Info>: About to execute checkra1n
#
# Checkra1n 0.1337.2
#
# Proudly written in nano
# (c) 2019-2023 Kim Jong Cracks
#
#========  Made by  =======
# argp, axi0mx, danyl931, jaywalker, kirb, littlelailo, nitoTV
# never_released, nullpixel, pimskeks, qwertyoruiop, sbingner, siguza
#======== Thanks to =======
# haifisch, jndok, jonseals, xerub, lilstevie, psychotea, sferrini
# Cellebrite (ih8sn0w, cjori, ronyrus et al.)
#==========================

 - [09/11/24 17:58:57] <Verbose>: Starting thread for Apple TV 4K Advanced board
 - [09/11/24 17:58:57] <Info>: Waiting for DFU mode devices
 - [09/11/24 17:58:57] <Verbose>: DFU mode device found
 - [09/11/24 17:58:57] <Info>: Checking if device is ready
 - [09/11/24 17:58:57] <Verbose>: Attempting to perform checkm8 on 8015 11
 - [09/11/24 17:58:57] <Info>: Setting up the exploit
 - [09/11/24 17:58:57] <Verbose>: == checkm8 setup stage ==
 - [09/11/24 17:58:57] <Verbose>: Entered initial checkm8 state after 1 steps
 - [09/11/24 17:58:57] <Verbose>: Stalled input endpoint after 1 steps
 - [09/11/24 17:58:58] <Verbose>: DFU mode device disconnected
 - [09/11/24 17:58:58] <Verbose>: DFU mode device found
 - [09/11/24 17:58:58] <Verbose>: == checkm8 trigger stage ==
 - [09/11/24 17:58:58] <Info>: Checkmate!
 - [09/11/24 17:58:58] <Verbose>: Device should now reconnect in download mode
 - [09/11/24 17:58:58] <Verbose>: DFU mode device disconnected
 - [09/11/24 17:59:18] <Error>: Timed out waiting for download mode (error code: -status_exploit_timeout_error)
 - [09/11/24 18:00:32] <Info>: Entered download mode
 - [09/11/24 18:00:32] <Verbose>: Download mode device found
 - [09/11/24 18:00:32] <Info>: Booting PongoOS...
 - [09/11/24 18:00:34] <Info>: Found PongoOS USB Device
 - [09/11/24 18:00:35] <Info>: Booting Kernel...
1.2. Checkra1n
Checkra1n越狱支持A5-A17设备,iOS 16.6 - iOS 17.x.x系统。(注意有很多仿冒域名)
如果提示无法使用,可以尝试勾选options的选项。
2. 砸壳
2.1. frida-ios-dump
3. 头文件导出
4. HOOK 及动态库注入
4.1. theos 编译工具及 tweak
4.1.1. tweak 安装环境及编译过程
# 安装theos
$ sudo git clone --recursive https://github.com/theos/theos.git /opt/theos
# 安装ldid
$ brew install ldid
# 环境
$ export PATH=/opt/theos/bin:$PATH
$ export THEOS=/opt/theos
# 根据命令行提示创建tweak项目
$ /opt/theos/bin/nic.pl
NIC 2.0 - New Instance Creator
------------------------------
[1.] iphone/activator_event
[2.] iphone/activator_listener
[3.] iphone/application
[4.] iphone/application_swift
[5.] iphone/application_swiftui
[6.] iphone/control_center_module-11up
[7.] iphone/cydget
[8.] iphone/flipswitch_switch
[9.] iphone/framework
[10.] iphone/library
[11.] iphone/notification_center_widget
[12.] iphone/notification_center_widget-7up
[13.] iphone/null
[14.] iphone/preference_bundle
[15.] iphone/preference_bundle_swift
[16.] iphone/theme
[17.] iphone/tool
[18.] iphone/tool_swift
[19.] iphone/tweak
[20.] iphone/tweak_swift
[21.] iphone/tweak_with_simple_preferences
[22.] iphone/xpc_service
[23.] iphone/xpc_service_modern
Choose a Template (required): 19
Project Name (required): aaa # 注入包的名字
Package Name [com.yourcompany.aaa]: bbb.ccc # 注入包的名字
Author/Maintainer Name [ddd]: ddd # 作者名
[iphone/tweak] MobileSubstrate Bundle filter [com.apple.springboard]: com.apple.springboard # 目标包名
[iphone/tweak] List of applications to terminate upon installation (space-separated, '-' for none) [SpringBoard]: SpringBoard # 目标应用名
Instantiating iphone/tweak in aaa/...
Done.
# 编译
make clean && make其中,原始makefile如下:
TARGET := iphone:clang:latest:7.0
INSTALL_TARGET_PROCESSES = 'SpringBoard'


include $(THEOS)/makefiles/common.mk

TWEAK_NAME = aaa

aaa_FILES = Tweak.x
aaa_CFLAGS = -fobjc-arc

include $(THEOS_MAKE_PATH)/tweak.mk通过对makefile编译选项配置实现项目定制化编译,其中可能用到的配置如:
- 指定处理器架构:ARCHS = armv7 arm64
- 指定 SDK 版本:TARGET = iphone:latest:8.0
4.1.2. tweak 代码编写及 Logos
5. 打包、重签名、安装
5.1. MonkeyDev 打包
MonkeyDev 是iOS集成开发环境,支持越狱和非越狱情况下的多种注入模式,且完美适配iOS打包签名流程。MonkeyDev内部自带砸壳支持,使用前需要先按说明进行配置frida-ios-dump。
5.1.1. 安装与卸载
- 安装最新的
theos和ldid
# 安装theos
$ sudo git clone --recursive https://github.com/theos/theos.git /opt/theos
# 安装ldid
$ brew install ldid
# 环境
$ export PATH=/opt/theos/bin:$PATH
$ export THEOS=/opt/theos- 在越狱环境下需要配置免密码登录
$ ssh-keygen -t rsa -P ''
$ ssh-copy-id -i /Users/username/.ssh/id_rsa root@ip- 安装 MonkeyDev 集成环境
# 指定xcode
$ sudo xcode-select -s /Applications/Xcode-beta.app
# 指定默认xcode
$ xcode-select -p
# 安装
$ sudo /bin/sh -c "$(curl -fsSL https://raw.githubusercontent.com/AloneMonkey/MonkeyDev/master/bin/md-install)"
# 更新
$ sudo /bin/sh -c "$(curl -fsSL https://raw.githubusercontent.com/AloneMonkey/MonkeyDev/master/bin/md-update)"
# 卸载
$ sudo /bin/sh -c "$(curl -fsSL https://raw.githubusercontent.com/AloneMonkey/MonkeyDev/master/bin/md-uninstall)"
5.1.2. MonkeyDev 环境配置
一般使用默认配置,同样可以在~/.zshrc或者~/.bash_profile配置文件中设置导出环境变量,如:
export MonkeyDevDeviceIP=localhost
export MonkeyDevDevicePort=22| 设置项 | 意义 |
|---|---|
| MonkeyDevBuildPackageOnAnyBuild | 每次 build 都生成 deb 包 |
| MonkeyDevCopyOnBuild | build 的时将 deb 包拷贝到设备的/var/root/MonkeyDevBuilds/目录 |
| MonkeyDevDeviceIP | 目标设备的 ip 地址,默认 USB 连接,localhost |
| MonkeyDevDevicePort | 目标设备的端口,默认 22 |
| MonkeyDevDevicePassword | 目标设备的 ssh 登录密码,默认为空使用免密码登录 |
| MonkeyDevInstallOnAnyBuild | 每次 build 都将 deb 安装到设备 |
| MonkeyDevInstallOnProfiling | 点击 Profile 才将 deb 安装到设备 |
| MonkeyDevKillProcessOnInstall | 安装的时候杀掉指定的进程,填写进程名 |
| MonkeyDevClearUiCacheOnInstall | 安装时 clear uicache |
| MonkeyDevPath | MonkeyDev 的安装路径,默认的,不用修改 |
| MonkeyDevTheosPath | theos 的安装路径 |
5.1.3. 创建工程
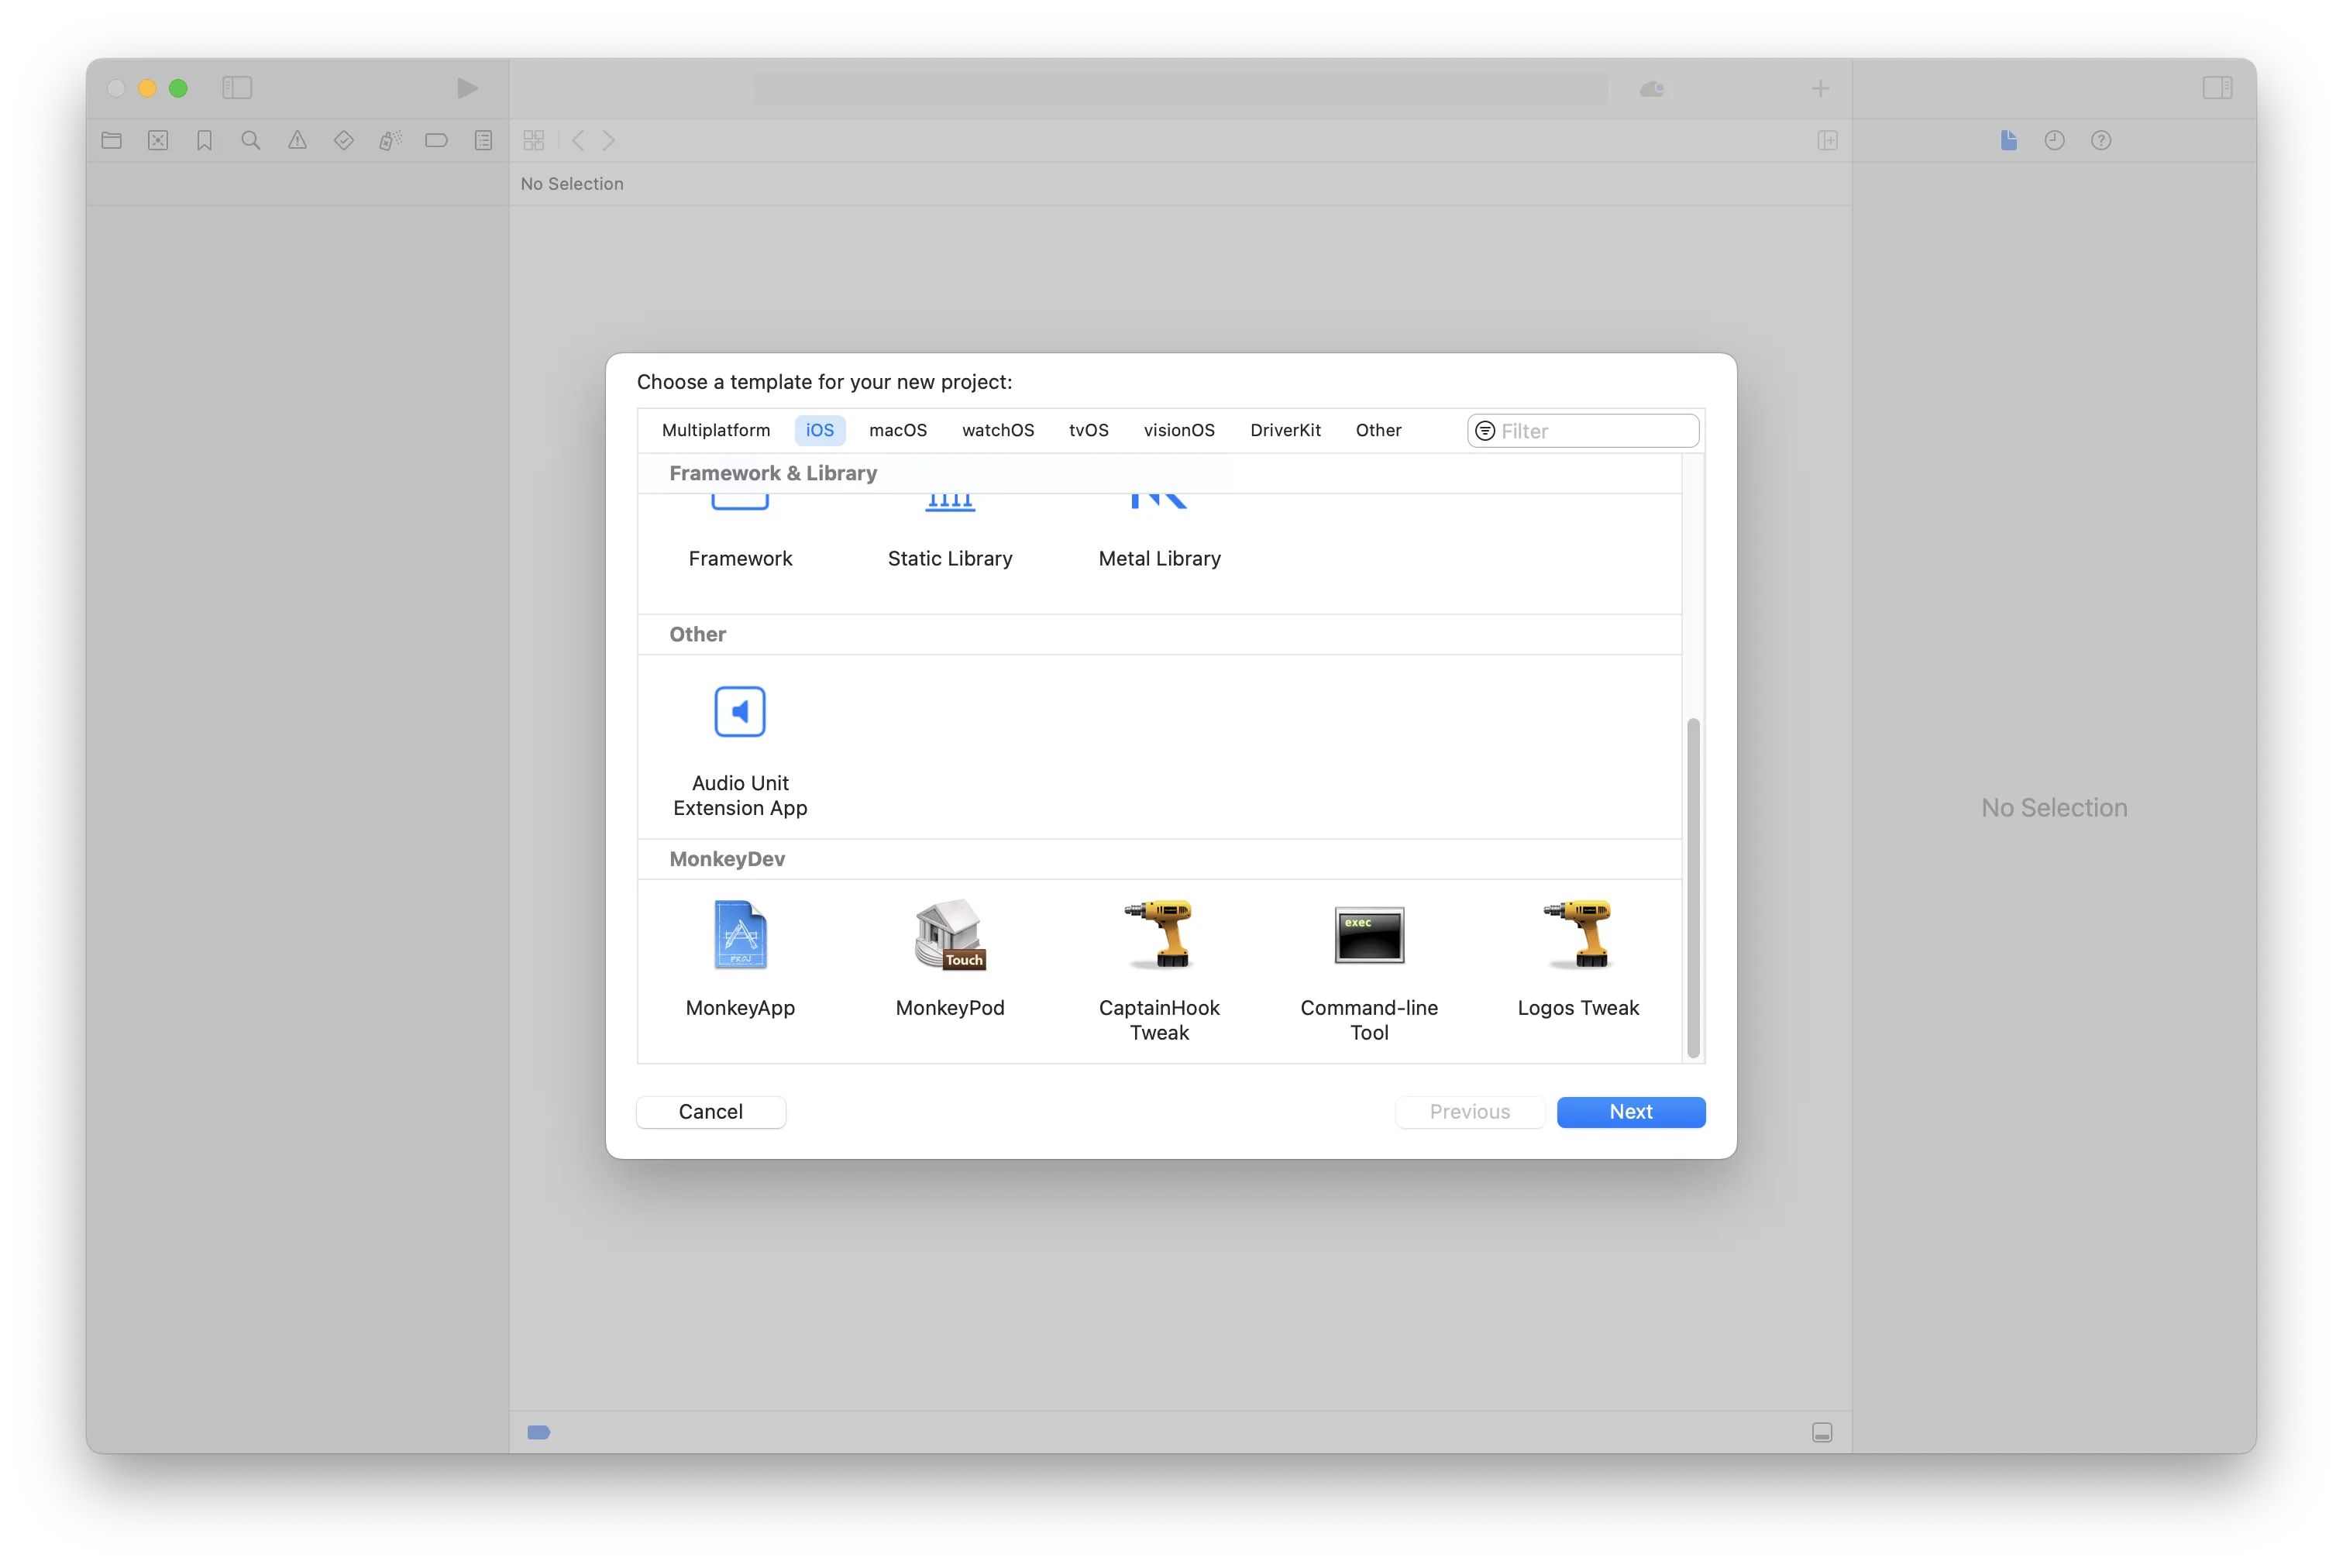
- 在
xcode里点击File - New - Project...创建iOS项目,选择MonkeyApp。
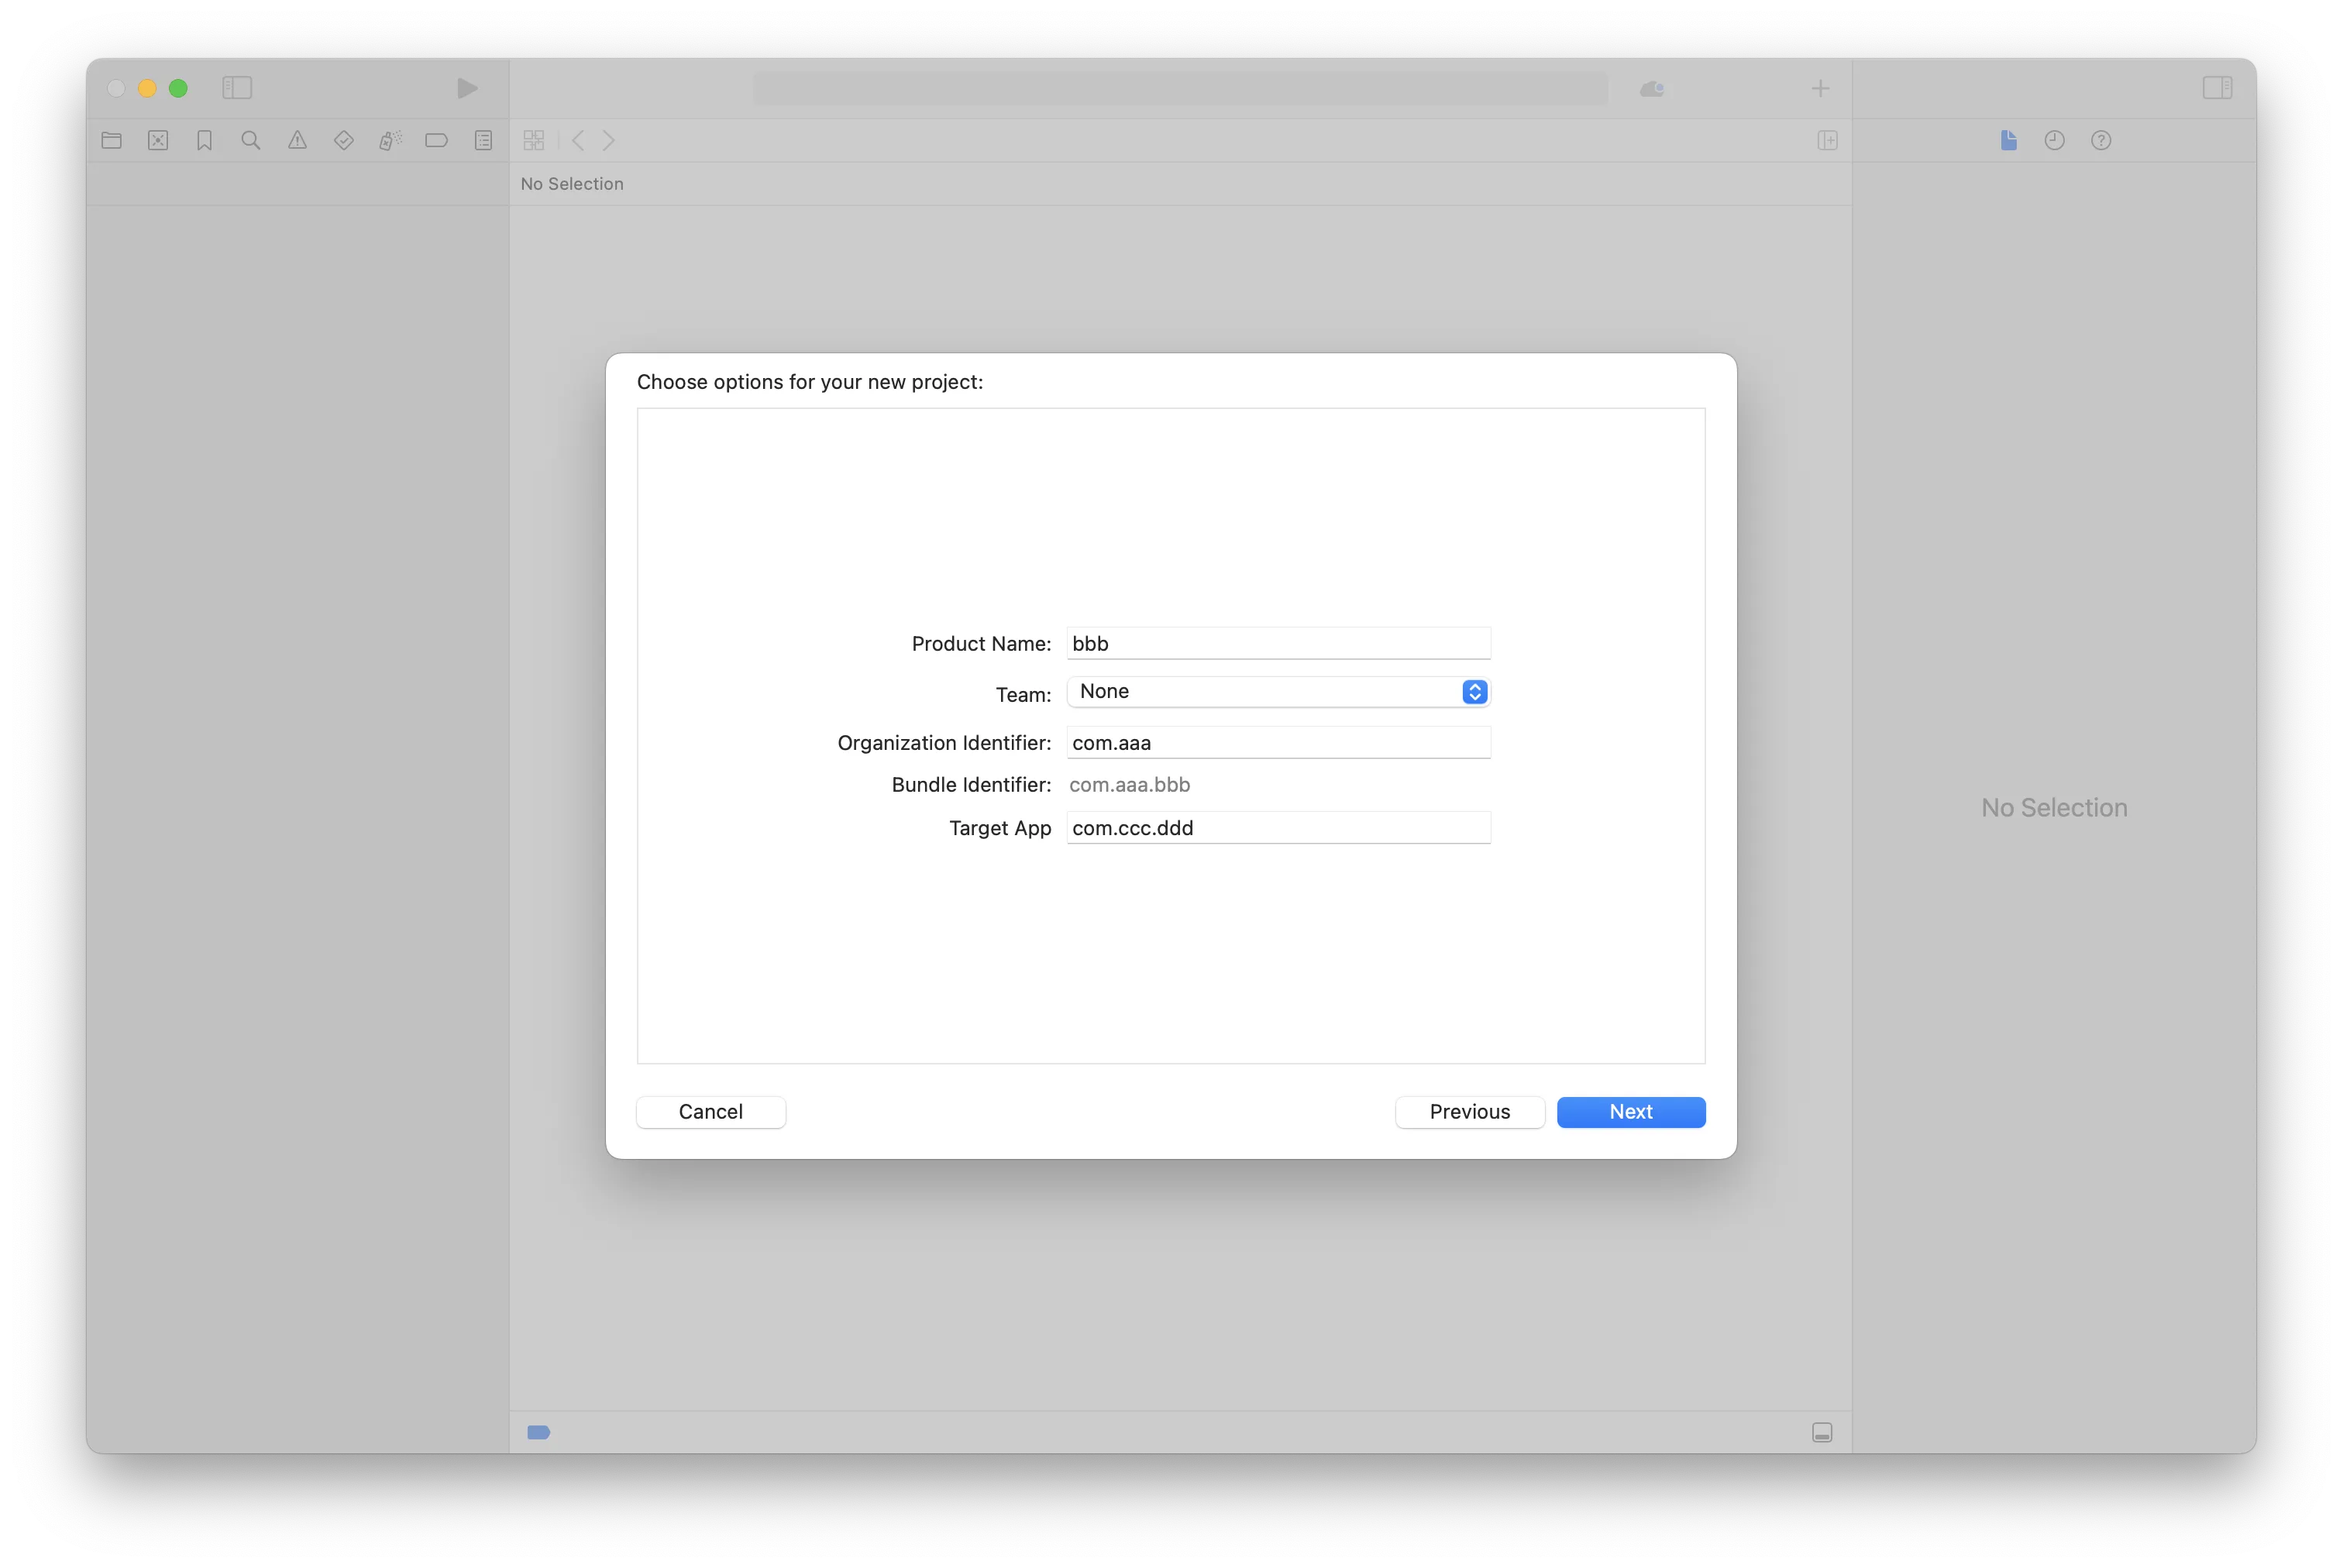
- 然后填写
Product Name,在Target App填写目标App的名字或者bundle id,工具将会自动使用frida-ios-dump提取ipa文件,如果是非越狱环境集成 APP,可忽略Target App,如下所示:
- 在项目中将砸壳后的
ipa文件拖至TargetApp中,同样有一些参数需要被关注,如下所示:
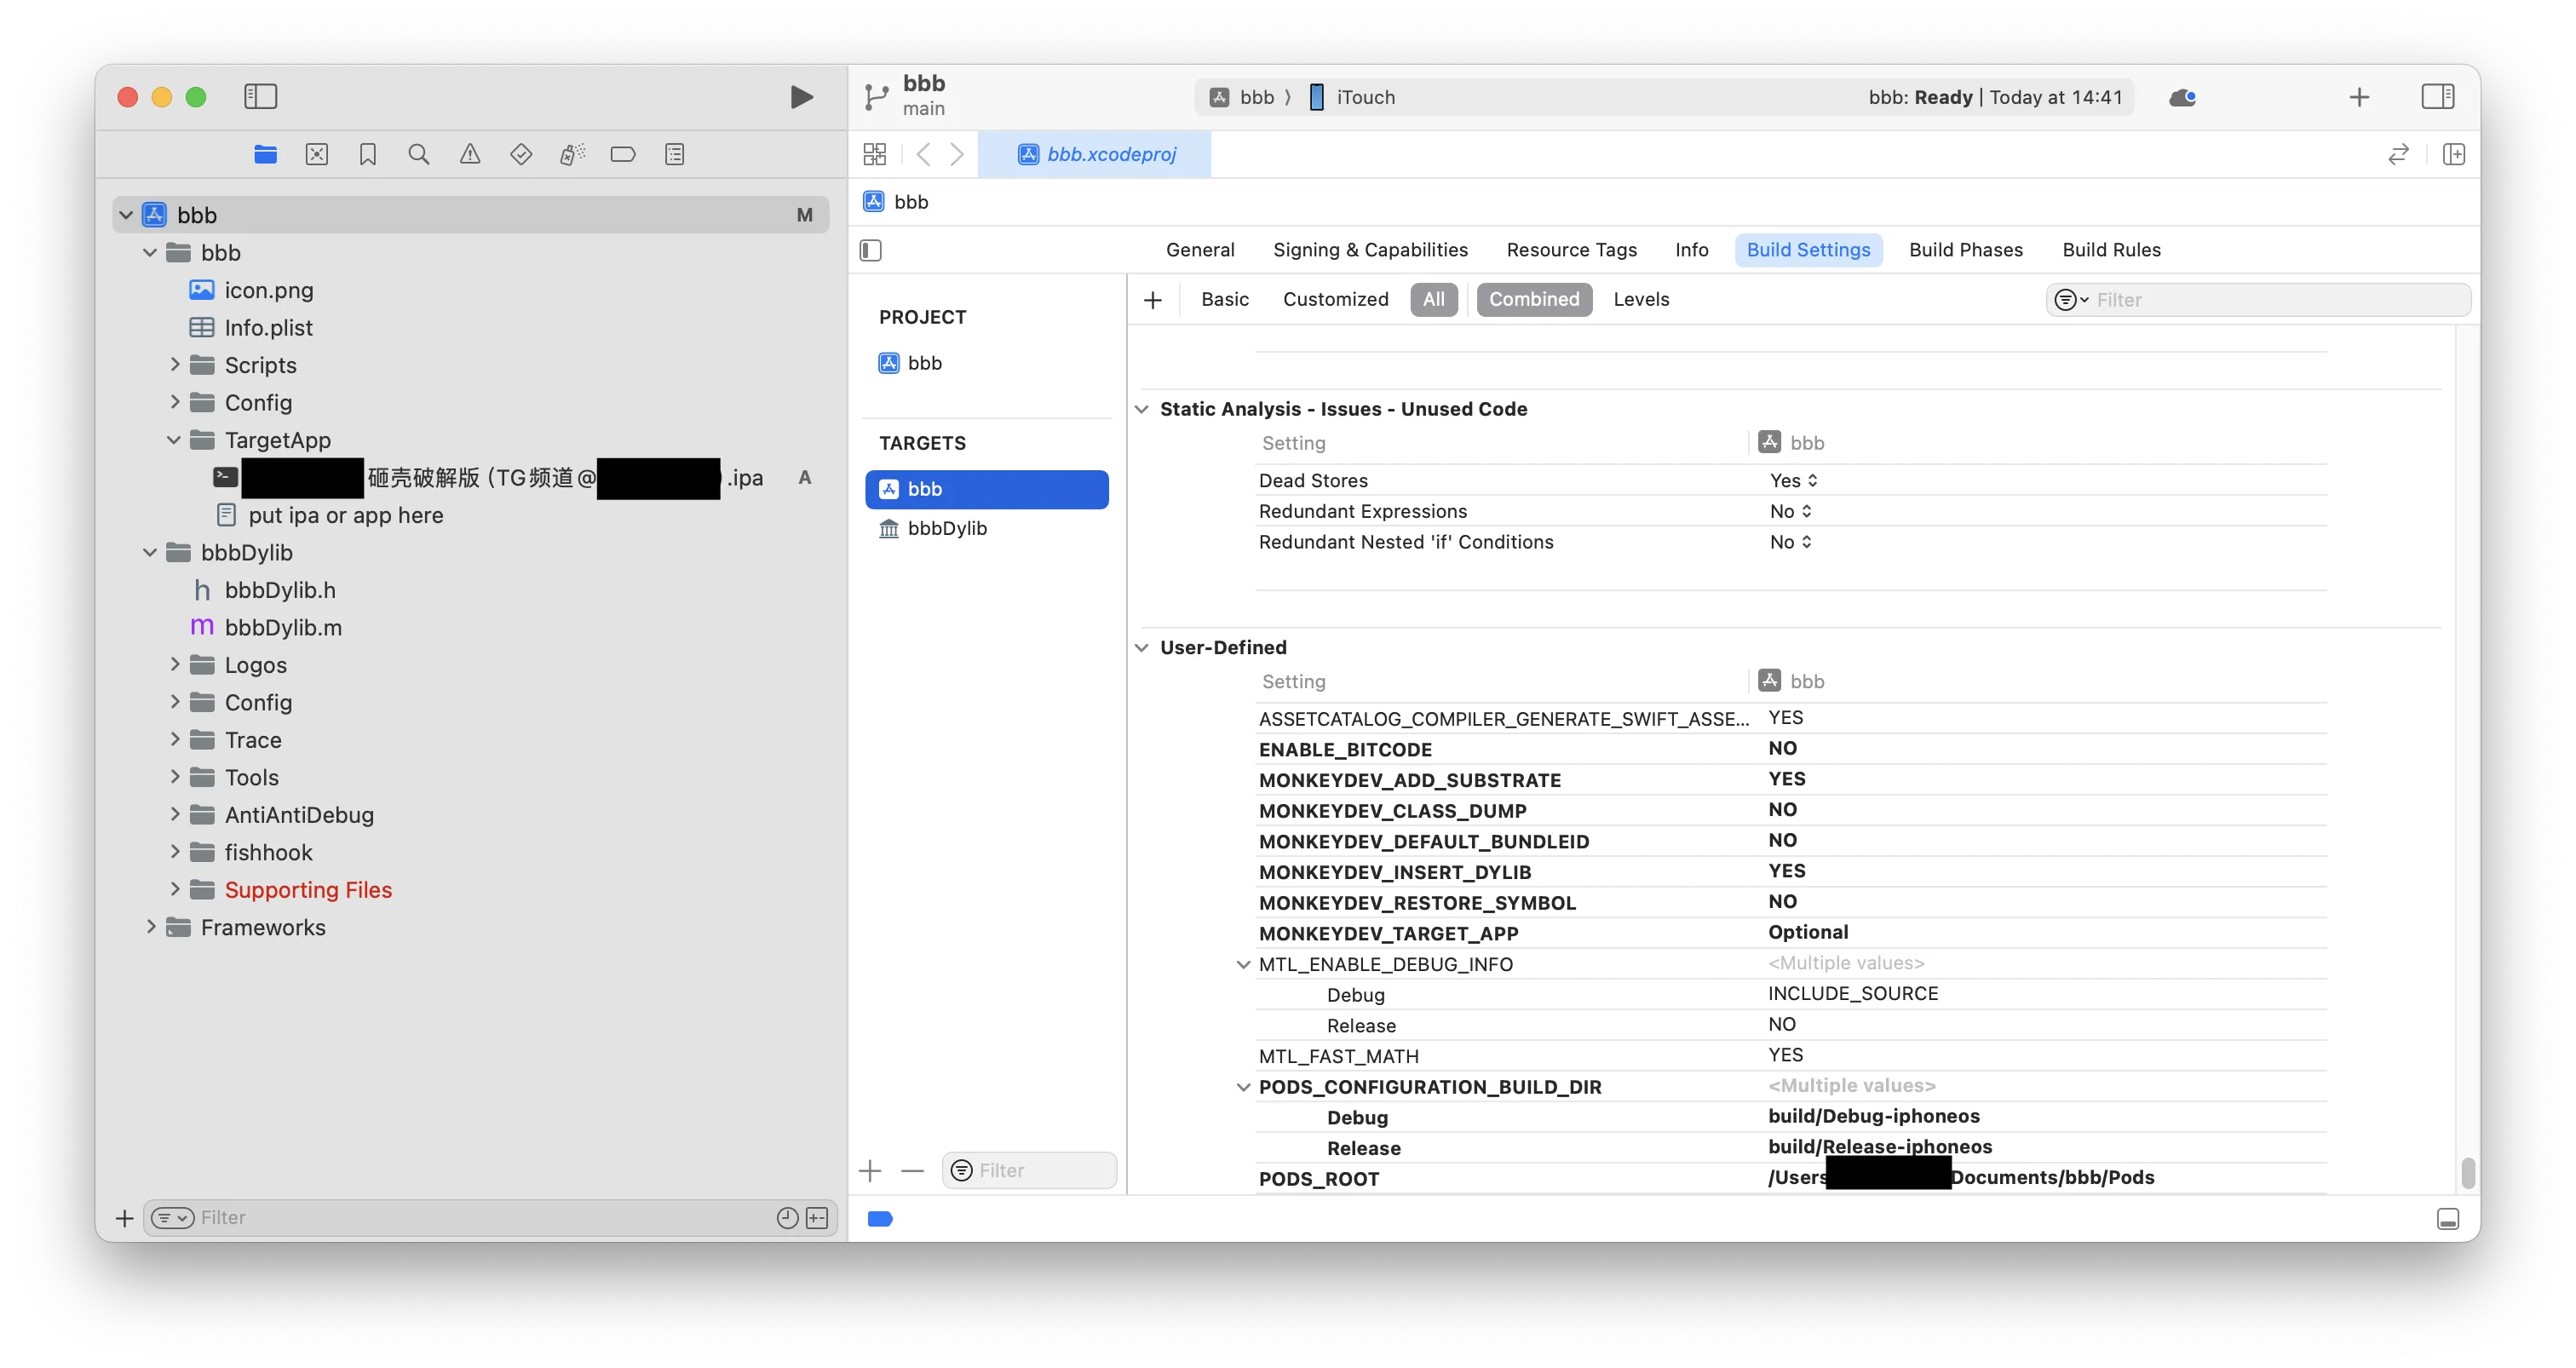
| 参数 | 含义 |
|---|---|
| ENABLE_BITCODE | 支持 Bitcode 编译 |
| MONKEYDEV_ADD_SUBSTRATE | 添加 MobileSubstrate |
| MONKEYDEV_CLASS_DUMP | 使用 frida-ios-dump 提取类名 |
| MONKEYDEV_DEFAULT_BUNDLEID | 使用 info.plist 中的 bundleID 而非项目 bundleID |
| MONKEYDEV_INSERT_DYLIB | 支持动态库插入 |
| MONKEYDEV_RESTORE_SYMBOL | 保留编译符号 |
| MONKEYDEV_TARGET_APP | 指定砸壳应用 |
| PODS_CONFIGURATION_BUILD_DIR | Pods 构建配置目录 |
| PODS_ROOT | Pods 根目录 |
monkeydev本身支持注入代码编写,同时支持多种注入框架
如步骤 3 图所示,bbbDyib是注入代码编写位置
bbbDyib.h、bbbDyib.m:原生注入框架Logos:tweak框架Config:这个是cycript的一些脚本下载以及methodtrace配置代码LLDBTools:这个是用于LLDB调试的代码,比如po pviews()AntiAntiDebug:这个里面是反反调试的代码fishhook:这个是自动集成的fishhook模块
- 编译后打包成
ipa文件,直接调用项目目录/LatestBuild/createIPA.command即可
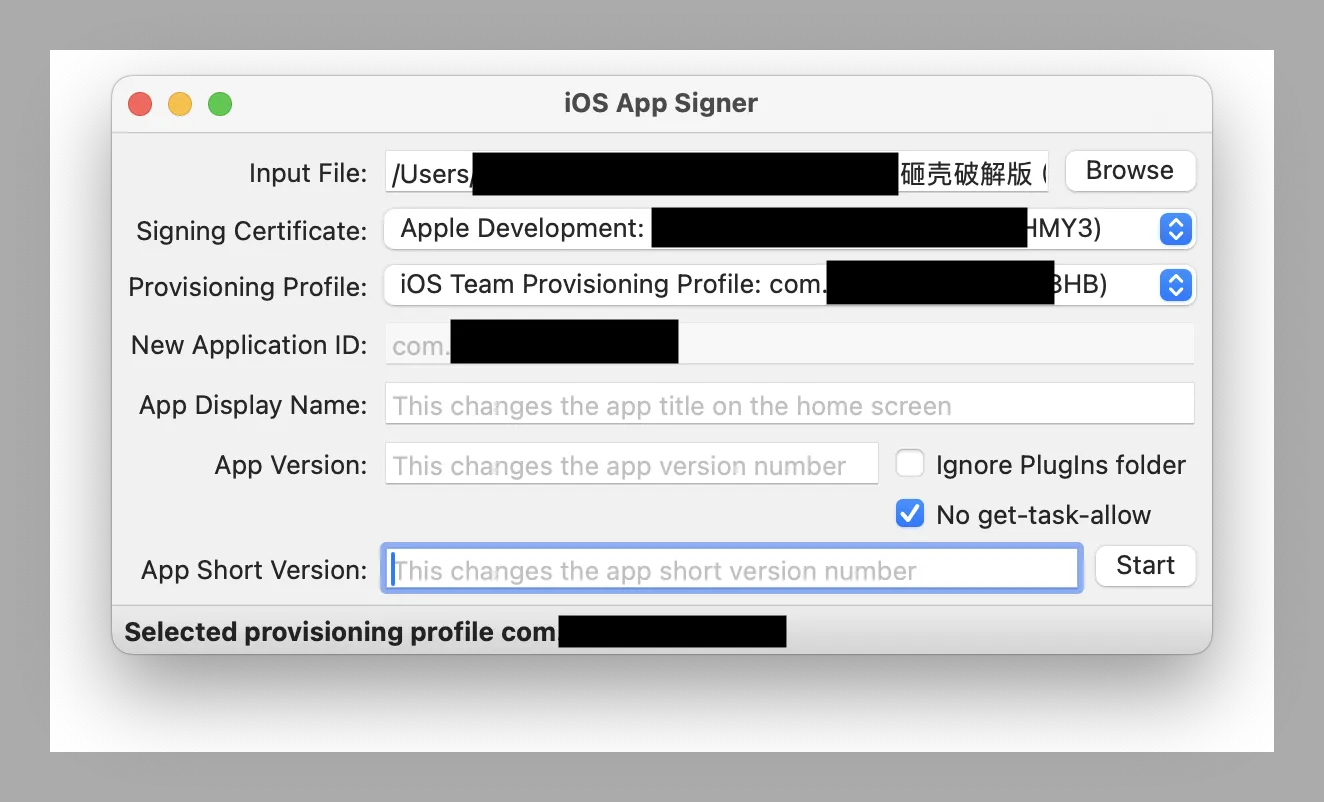
5.2. iOS APP Signer 重签名
软件比较简单易用,按顺序选择输入ipa文件,选择签名证书,选择Provisioning Profile,然后点击start即可。
5.3. 安装
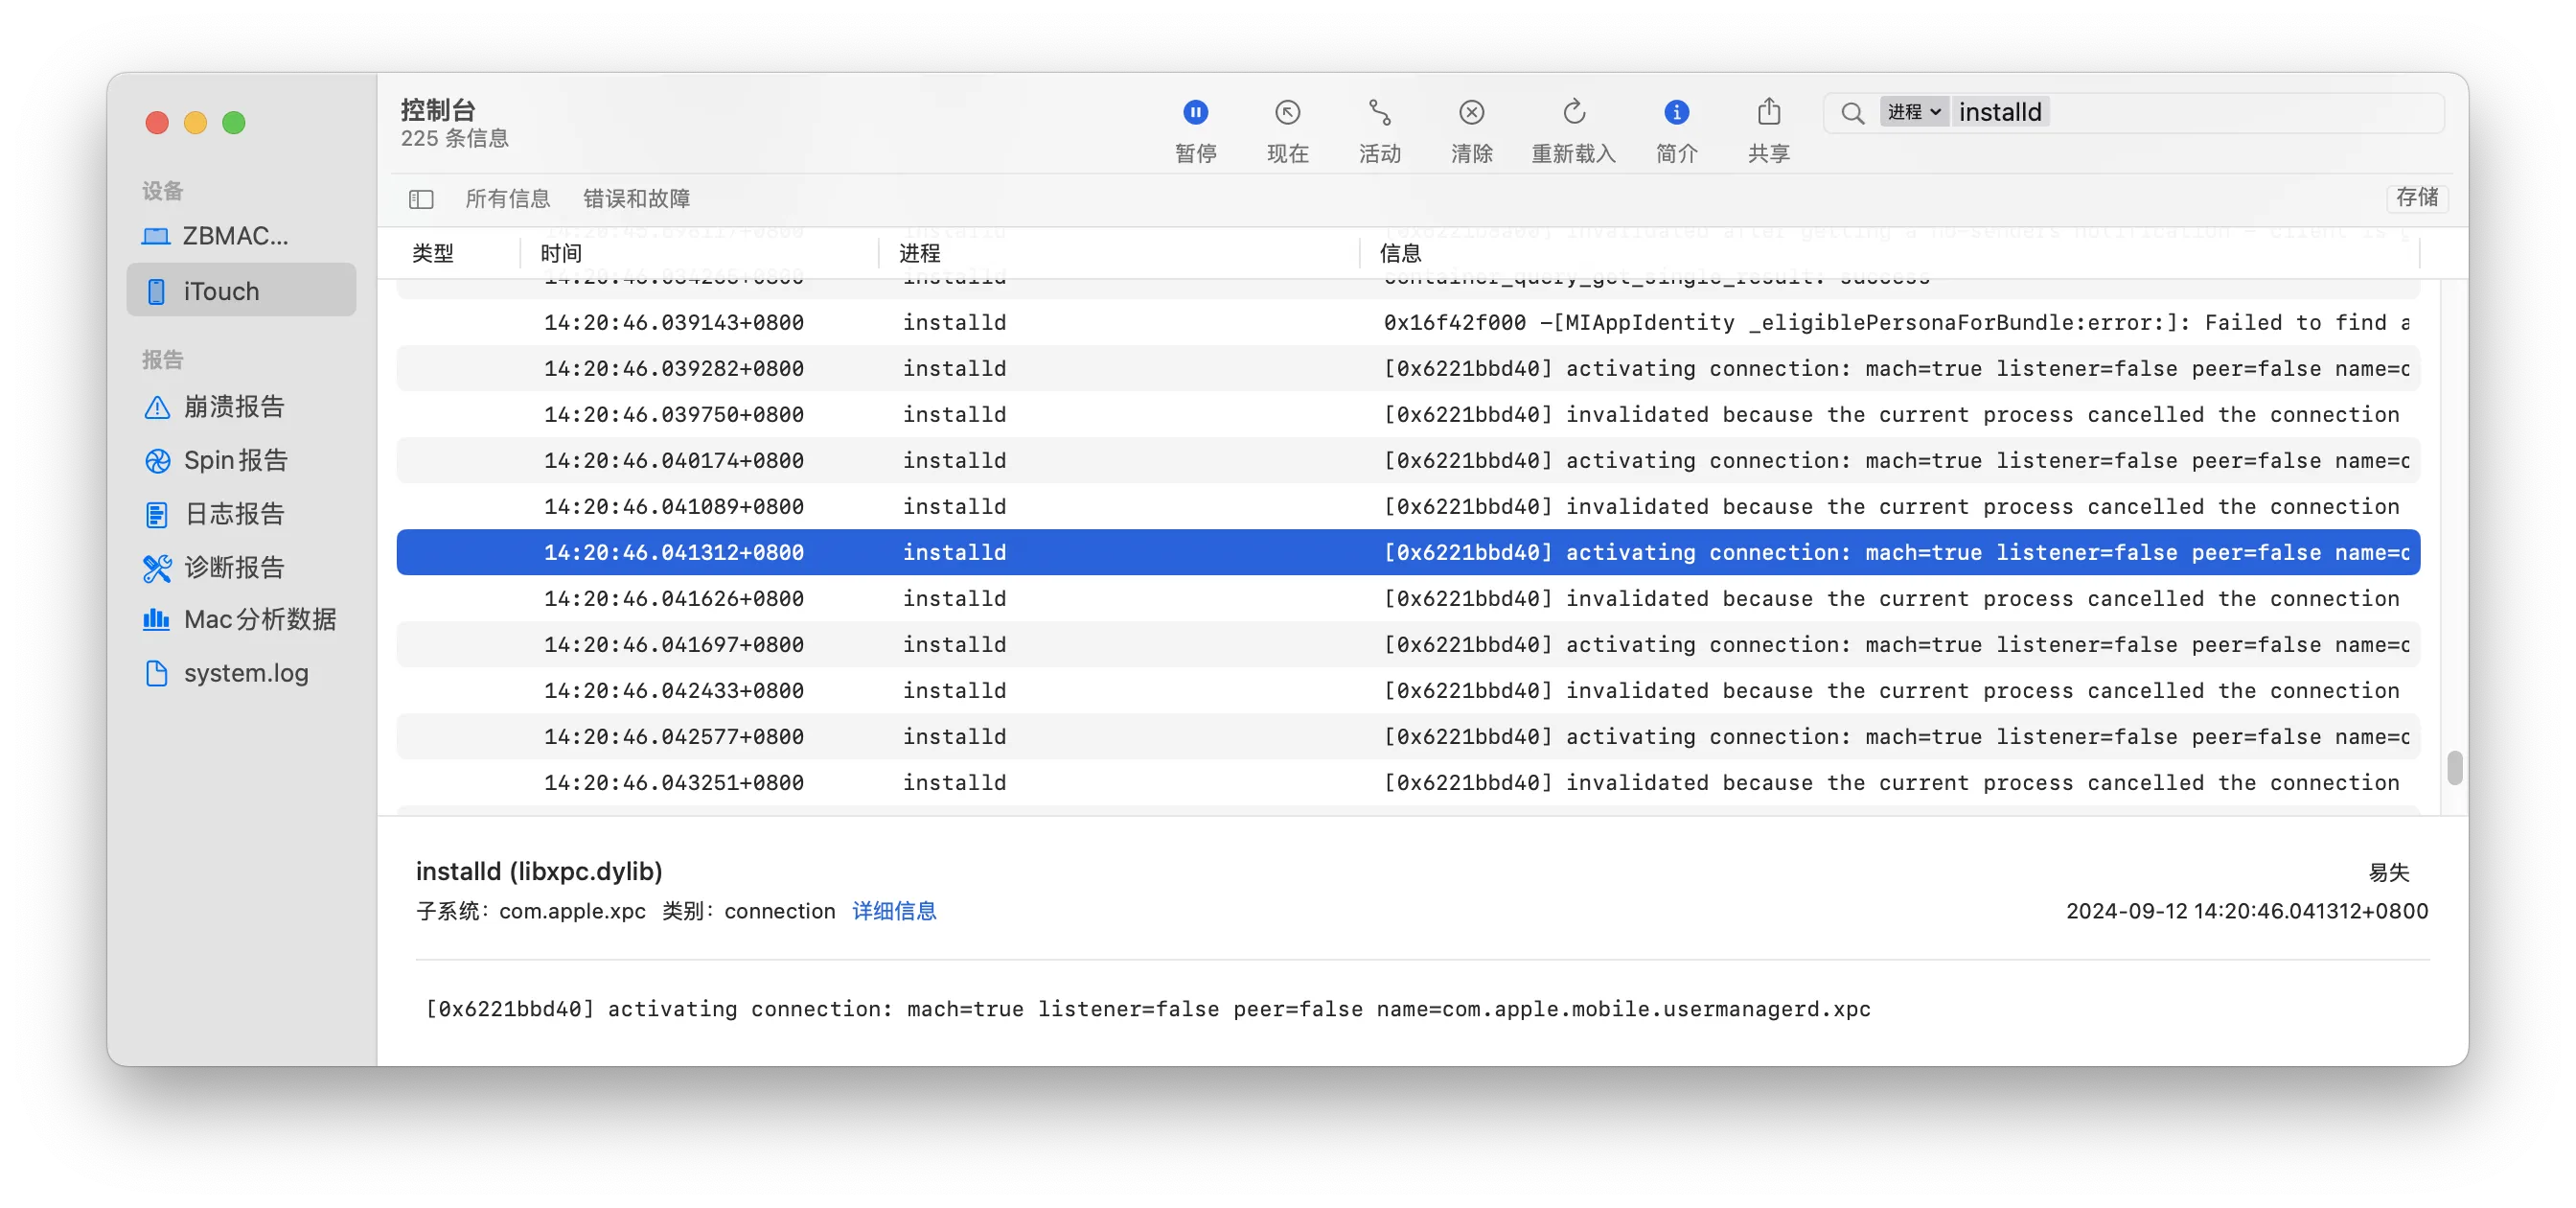
通过 xcode 安装或者使用三方工具安装(如爱思),如果安装不成功且无有效日志,可以通过控制台查看设备日志,进程名为installd:
6. 参考文献
- AloneMonkey/MonkeyDev: CaptainHook Tweak、Logos Tweak and Command-line Tool、Patch iOS Apps, Without Jailbreak.
- theos/theos: A cross-platform suite of tools for building and deploying software for iOS and other platforms.
- TKkk-iOSer/TKTweakDemo: iOS 逆向 — 简单 hook 微信,实现 hello World
- AloneMonkey/frida-ios-dump: pull decrypted ipa from jailbreak device
- DanTheMan827/ios-app-signer: This is an app for OS X that can (re)sign apps and bundle them into ipa files that are ready to be installed on an iOS device.
- 爱思助手
- checkra1n
- palera1n
- IOS+OSX 逆向去除应用 Bundleid 校验
- 应用代码注入
